Text

~my thoughts about life~


Showing posts with label Recipes. Show all posts

Friday, February 14, 2014

White French Salad Dressing

Around Christmas, my business partners and I took ourselves out to dinner.  We chose an upscale, local restaurant that has been around since the dawn of time.  They charge way too much for a tiny steak, but it's 5 minutes away and we can't afford to eat there any other time.

I quickly decided upon the Chicken Parmesan, which only came with a small side salad.  There was a wedge salad on the menu that included all that good stuff like sourdough croutons, bacon, blue cheese, and other goodness.  I had to have it.  It came with White French Dressing.  I am a Ranch girl at heart (or the occasional sweet and sour), so I asked for the dressing to be put on the side.  I asked for a side of Ranch too, in case I didn't like the White French.  Honey, let me tell you how good that dressing was!  If it wouldn't have been a classy establishment, I probably would have licked the dressing cup!  I assumed the primary ingredient was crack because it was downright addictive.

I've thought about that dressing a lot since then.  I may have even dreamed about it.

I recently mentioned that we decided upon a venue for our May banquet.  It's that restaurant.  As overpriced as the restaurant was, the banquet meals are actually quite reasonable.  When my mom and I had lunch there, we asked if the White French was an option for the banquet.  She explained that it's homemade by the chef, so she would see if he was willing to make that large of a quantity.  We told her how much we loved it and complimented it greatly.  "Oh it's just Hellman's mayonnaise...." and she started LISTING the ingredients!  My eyes widened and I tried my very best to memorize them.  I came home and Googled recipes, looking for something close that could give me and idea on measurements.  No such luck.  I decided to buy what I needed and give it a try on my own.

Today, I sat down at the computer and Googled it again.  My second hit seemed to find the perfect recipe!  It lined up perfectly with the ingredients she mentioned.

1 C Hellman's mayonnaise
1/4 C grated onion
1 t Dijon mustard
1 T plus 2 t white vinegar
1 T plus 1 t sugar

Place mayo in a bowl.  Grate onion, then mince by hand.  Measure onion; add to mayo.  Add remaining ingredients and stir well.  Refrigerate overnight.  Makes 1 cup.

I couldn't wait for it to sit overnight, so I indulged right away.  I'm watching calories, so I tried not to use too much.  But what I had was very tasty!  If you're in the mood to try your hand at homemade salad dressing, give this one a try.  It's quite simple.

Anyone ever heard of White French before?  Let me know if you ever decide to try this recipe!

(Note:  With any recipe I make, I typically cut down on onions.  I only used 1/8 C and can't imagine using any more.  I also added a pinch more sugar.)

Tuesday, November 5, 2013

What's For Dinner?

In my recent search to find new meals to make for my family, I stumbled upon this recipe on Pinterest.  While Hubby is not a fan of Alfredo sauce, I thought I could try this homemade version and maybe, just maybe he would like it.  I figured it was a long shot with the kids, but I'm tired of the same few things for dinner and I needed another option.

Disclaimer:  I found this recipe BEFORE I set out on my venture to lose weight.  This recipe does not fall in line with any type of weight loss program!  In fact, I made it for the second time a week ago and I think I gained about 3 lbs. after eating it!  (I also had a Snickers that day.  Hmmm....)  BUT, it's heavenly!  I called my cousin over to taste it and she nearly melted on the floor (melted, I guess, because of the amount of CHEESE in it)!!!  My cousin requested that I make it this weekend for our Bridesmaid planning get-together (AKA Girls' Night In).  Done and done.

The author of the recipe called it Chicken Alfredo Roll-Ups.  I refer to it as Alfredo Lasagna.  Either way, it's delectable!  (Her picture is better looking than my cell phone shot.)

The Ingredients:
½ cup butter
2 ounces cream cheese
2 cups heavy cream (or substitute half and half)
2 teaspoon garlic powder
½  tsp. fresh minced garlic
salt and freshly ground black pepper
½ tsp dried oregano
⅔ cup parmesan cheese

9 lasagna noodles
2 cups cooked, shredded chicken
oregano
garlic salt
3 cups shredded Mozzarella, or cheese of your choice


The Process:
In a medium to large saucepan melt the butter over medium heat. Add fresh minced garlic and cook for 1 minute, or until fragrant. Add the cream cheese and whisk to smooth and melted. Whisk in the heavy cream. Season with the garlic powder, salt and pepper. Bring to a simmer and whisk frequently until sauce thickens, around 15 minutes. Stir in the cheese and when melted, remove from heat.

While sauce is simmering, boil lasagna noodles according to package directions. Drain and rinse the noodles with cold water to prevent them from sticking to each other. Then, lay out each noodle individually and blot dry with a paper towel.

Spread about 2 Tbs. alfredo sauce over each noodle. Sprinkle oregano and garlic salt on top of sauce. Take 1/9 of the shredded chicken and spread it out evenly over each noodle. Sprinkle with mozzarella. To roll up, start at one end and roll the noodle over the toppings. You will need to lift the noodle a little to prevent squishing out the inside ingredients while rolling.

Place the roll-ups in the pan, one by one, seam-side down so they don't come undone. Once they are all in the pan, pour the remaining alfredo sauce over the top. Top with remaining cheese. Bake at 350 degrees for about 30 minutes, or until the cheese is completely melted on top.


My Notes:
I used half & half and it tasted just great. Real cream is just way too fattening. Next time, I'm going to use light cream cheese also. I omitted the pepper and oregano. I used one clove of garlic instead of the minced garlic and garlic salt. I only used 2 C mozzarella and it was perfect. There is no need for another full cup of cheese. Also, I think I'll cut down the butter to 3/4 of a stick, as it was just a tad greasy.  

We had leftover fried chicken from a family dinner. I brought home 3 breasts and de-boned them. That worked out perfectly and I didn't have to take the time to cook chicken!  

Also, in both of my experiences making this dish, it took way longer than 15 minutes for the sauce to thicken. So if you're impatient or in a hurry, plan for extra time to thicken the sauce.

I hope you try this recipe...it is so good and I think you'll love it!

Monday, July 29, 2013

I'll Have a Steak Sandwich, and a....Steak Sandwich

Bonus points if you know what movie this post title came from.  Hint:  Just put it on Mr. Underhill's tab.

I made something else new for supper last week.  Hubby declared it to be in his top five, or maybe even his top three.  Son #1 agreed.  Son #2 picked, cried, gave dirty looks, and yelled at anyone who was looking at him.  You do the math.

I noticed Beef Round Thin Sandwich Steak in my grocer's meat case.  I had never seen it before.  It was 6 very thin slices of steak, each about 2-3" wide.  The packages were around $5 and were BOGO.  I bought two.

I went to the bakery section and bought the best looking sub rolls I could find.  At the deli, I bought thick slices of Mozzarella.  I already had onion, but my mushrooms were bad.

I thinly sliced sweet onion and sauteed it in oil.  Before it was done, I added thinly cut strips of the steak.  I seasoned them with salt, pepper, and a dash of garlic powder.  I cooked it all at a medium high heat for just a few minutes.


I spooned several strips of steak onto one of the delicious buns, topped it with cheese, and popped it in the hot oven.  I added mayo and tomato to mine.  The guys took theirs plain.

For a side, I made oven fries.  Those went over very well!  I sliced 3 medium-large potatoes into 1/4" strips.  I tossed them in 2T oil and 1/2 t salt.  I layed them out on a greased cookie sheet and baked at 450 for 30 minutes.  They were a little tricky to get off the cookie sheet, but they were delicious!  The guys fought over the crispy fries.

The verdict:  I'm definitely adding this to the rotation.  It was quite simple and half the family liked it.  (Those are the best odds I can expect right now.)  One package of the meat (.64 lb.) made 4 sandwiches for us.  One of them was kind of skimpy though.  3 potatoes did not make enough fries for us.  I'll do 4 next time.

Anyone else ever make steak sandwiches?  I'd like to try a Chicken Philly version!


Wednesday, July 24, 2013

What's for Dinner?

I've been talking a lot lately about changing our typical dinnertime routine.  I'm sick of the stress over what to make, followed by the complaints from my family about what I made.  I'm sick of the kids not eating, sick of the husband half-heartedly eating, and sick of having to clean up after it all.  I decided to lay down the law, list my demands, and try out some new recipes while trying to conform my picky eaters to a normal family.

Pinterest is a great site to find new recipes.  We are extremely picky eaters, so I can only even consider about 1/50 of the recipes on there.  I'm not going overboard here...just trying to stick to somewhat normal things.

This week I tried Italian Chicken Casserole.  I would describe it as a creamy chicken spaghetti.  It is very similar to the Mexican Spaghetti I make, but with Italian flavor instead of Mexican.  Plus, there are no "cream of" soups, which I'm totally over at this point.  I can always taste the fakeness of that soup when I use it in a recipe.

The verdict:  Awesome!  I really enjoyed it.  Hubby said it was good, but 3 of the kids had to be force fed.  Big Sis said that it honestly wasn't that bad.  It's something I'll bring back again with no concerns that it's another thing added to the list of things my children hate.  And by the way, it's definitely not low fat.

Italian Chicken Casserole

2 T olive oil
1 C onion, chopped
3 cloves garlic
3 C cooked chicken, cubed
2 (14 oz.) cans diced tomatoes with garlic, basil, and oregano
1 C heavy cream
3 oz. cream cheese
2 C shredded Mozzarella
8 oz. angel hair pasta, cooked

Preheat oven to 350.  Spray a 9x13" baking dish with nonstick cooking spray.

In a large skillet, heat oil.  Add onion and garlic; cook 3 minutes.  Stir in chicken, tomatoes, and cream.  Bring to a boil.  Simmer 10 minutes, or until slightly thickened.  Add cream cheese and 1 C Mozzarella.  Cook, stirring constantly, until the cheeses are melted.  Add cooked pasta, tossing gently.  Spoon into prepared dish.  Sprinkle with remaining cheese.  Bake 30 minutes.

My notes:  I dialed down the onion and the garlic, as I always do.  I salted the chicken when I cooked it, as some of the commenters said it needed salt.  I didn't actually measure my chicken, but I think it could have used a bit less.  The chicken seemed to overwhelm the dish a bit.  Several commenters said that their family did not like the chunks of tomatoes and they used pasta sauce instead.  I used my potato masher to crush as many tomatoes as possible.  The kids still complained about the chunks, but I loved it that way.  I also used a half pint of cream, without measuring.  Is that a full cup?

I had leftovers for lunch today, and while it was a tad bit dry from being refrigerated, it was still delicious.  I recommend giving this one a try.

Monday, July 1, 2013

Dinner Experiment - Day 3

I don't normally cook on Friday nights, so this was the last night of new dinner experiments for our family.  I decided on Fettuccine Alfredo.  Hubby neither likes fat pasta nor Alfredo sauce...so he thinks.  In a restaurant, he always orders angel hair.  When I make pasta, I always use thin spaghetti.  So, I already had one strike against me.

Hubby has only had Alfredo sauce once and didn't like it.  At all.  I made it from a friend's recipe, which had a cream cheese base.  It was way too thick and I didn't care for it either.  I actually thought I didn't like Alfredo sauce for quite some time.  When I went to a family style rehearsal dinner, I tried a bit of everything.  Turns out, the fettuccine was amazing!  Since then, I've had it here and there and have always liked it.  We just had one bad experience.  The difference is, I'm willing to try it again while Hubby holds a grudge.

I knew it was a thinner sauce I liked, not the thick, cream cheese sauce.  So I decided upon a standard Parmesan, Romano, butter sauce.  It also called for a cup of heavy cream.  I thought I could use whole milk instead, since I had it.  Hmmm....probably a bad decision.  The sauce didn't thicken.  I ended up making a roux on the side with flour and butter and adding it to the sauce.  That actually made it perfect.  Also, instead of buying a block of Romano and a block of Parmesan, I bought a bag of Kraft shredded Italian blend.  It had Parmesan, Romano, asiago, mozzarella, and provolone, I think.  I was worried about using all those extra cheeses, but I actually liked it.  I used a bit less than a cup.

My verdict:  Delicious and very easy!  Hubby's verdict:  OK.  The Kids:  Thumbs Down.  Then again, most meals are thumbs down for them.  I'll make it once in a while, but it's too fattening to make regularly...especially if I use cream like the recipe states!

Fettuccine Alfredo
1 lb. fettuccine
2/3 C butter
1 C heavy cream
dash garlic salt
1/2 C grated Romano
1/3 C grated Parmesan
salt & pepper, to taste

Cook pasta; drain.
In a large saucepan, melt butter into cream over low heat.  Add salt, pepper, and garlic.  Stir in cheese over medium heat until melted.
Add pasta to sauce.  Serve immediately.

Next time, I might try it with chicken.  The kids would really hate that!

Also, I noticed in the comments of the recipe, most people said there was too much pasta and not enough sauce.  So I ended up using about 3/4 of the box of pasta and it was just about right.  I even had some leftover for lunch the next day.  I served it with garlic bread.

Friday, June 28, 2013

Dinner Experiment - Day 2

I was encouraged by Tuesday's meal so I was totally gung-ho for Wednesday's.  I decided upon Stir Fry.  Yeah, I know that's another normal meal to most people, but that's what I was aiming for.  It's something I've never actually made myself and my family is happy to eat at a hibachi restaurant.  So...

I called up my sister-in-law to see how she makes hers.  I tasted a bite of it once and enjoyed it.  She used different vegetables than I like, so I did just a bit of altering.

The Process-
Cut into bite sized pieces:
2 boneless, skinless chicken breasts
1/2 of a zucchini
1/2 of a large, sweet onion
1 C mushrooms

Steam 1C white rice according to package directions.

In a large skillet, add 1-2 turns around the pan of olive oil.  Add chicken with a few dashes of soy sauce.  Cook about halfway through; add the vegetables.  Continue cooking, adding more soy sauce, if desired.

When rice is finished, heat a skillet on high heat, adding 1-2 turns of olive oil.  Add cooked rice and as much soy sauce as you like.  Slightly brown the rice, making it a little crispy.

Add the fried rice to the meat and vegetable mixture.  Serve immediately.

The Verdict:  A Winner!

Here is what I did wrong.  I started the chicken and veggies before the rice.  I ended up having to wait on the rice, which made my veggies overcook.  They were very soft and lost the slight crunch I desired.  I tasted them 10 minutes before the rice was done and they were perfect.  This is why I put in the recipe to start the rice first, then the chicken.  I started the chicken and veggies at the same time, which isn't the best idea.  Also, my chicken breasts were quite large and I ended up with too much meat (for us).

My kids pretty much picked out the rice only, but I'm sure a couple veggies slipped through unnoticed.  They each had to try the chicken and the veggies.  One of them said they kind of liked the chicken.  Just a little.  I'll take it as a victory!

I forgot to take a photo until we were done.  This was all that was left in the pan.

I added extra soy sauce at the table.  I would love to have a bottle of that ginger sauce they give you at the Japanese steakhouses!  Oh, and that ginger salad dressing!  And the onion soup!  OK, I'm not Japanese, but I did my best!!!

Thursday, June 27, 2013

Dinner Experiment - Day 1

Tuesday was Day #1 of Experiment New Dinnertime.  I made meatloaf.  Yeah, I thought I would start out with something totally horrible by the standards of picky kid eaters.

When Hubby and I were talking on the phone a couple days ago, he said he was on board with The Dinner Nazi, but there were certain things he just couldn't eat.  I told him I understand that.  I'm not going to make totally ridiculous things....only things that most normal people like.  He listed some specifics...fish, ketchup, and a couple others.  When I agreed I would not cook those things, he said, "Good, meatloaf is out then!"  Little did he know, it was on the way...

I don't like ketchup either, and I think that's why meatloaf has always left a bad taste in my mouth.  (Pun intended.)  The last time I remember eating meatloaf was when I was probably 8 and it was a major chore to get down.  I got thinking- that's ridiculous!  How can I hold onto that idea for nearly 30 years that meatloaf is disgusting???  I'm a fairly good cook.  I can put in the meatloaf whatever I want.

So I googled "no ketchup meatloaf."  Turns out, I'm not alone in the ketchup in meatloaf aversion.  Tons of results came up.  One of the comments said, "Isn't that the point of meatloaf?  To put in whatever you have on hand?"  So, I decided to customize our own meatloaf.

Here's the recipe I started with:
1 1/2 lbs. ground beef
1 C bread crumbs
1 onion, diced
1 egg, lightly beaten
1 1/2 t salt
1/2 t pepper
16 oz. tomato sauce
3 T vinegar
3 T brown sugar
2 T Dijon mustard
2 T Worcestershire sauce
1/2 C water to thin, if necessary

Of course, I dialed down the onion- a lot!  I can't stand when food is overpowered with onion flavor.  I dialed down the pepper, eliminated the vinegar, mustard, and Worcestershire sauce.  I thought the vinegar is what would give it more of a ketchup taste.  And I don't have Dijon mustard or Worcestershire.  I didn't use the water.  I added a dash of garlic powder, as I was out of fresh, and a couple shakes of Italian seasoning.  My goal was to make it more like Italian meatballs, which Hubby & I both like.  (The kids like NOTHING!)

Directions:
Preheat the oven to 350.  Mix together beef, bread crumbs, onion, egg, salt, pepper, and 1/2 C tomato sauce.  Form this mixture into a loaf and place in a shallow pan.  (I used a loaf pan to make it look like traditional meatloaf).  Stir together the remaining ingredients, using the water if needed.  Pour over the meatloaf.  Bake 1 hour, basting every 15 minutes with the pan juices.

I had an appointment, so I covered the top with about 3/4 of the prepared sauce, put it in the oven, and left. I did not baste.

The verdict:  pretty good!  The sauce on top was very sweet.  I liked that; Hubby thought it was too sweet.  If you don't like sweet food, dial down the brown sugar a bit.  Of course, all my kids fought me, yet I made them eat some.  I think I'll add it to the occasional rotation.  It was very easy to make ahead and pop in the oven later.  I served it with mashed potatoes and corn on the cob.

Your thoughts about Meatloaf:  love it or hate it???

Friday, February 15, 2013

Airing Out Dirty Laundry

I moved up another notch on the scale of Little House on the Prairie-ness.  (My goal is to be halfway between an Ingalls and a tech-savvy woman of the 21st century.  How eclectic!)

This morning, I made my own laundry detergent!  Yes, you all know I'm cheap.  You also know that I am lazy.  Adding up the pros & cons, I decided that I can do this once or twice a year to save some big bucks.  I must say, it wasn't that hard.

I have a friend who always smells so clean and fresh.  Finally, I asked her what kind of laundry soap she used.  She replied that she makes her own!  She said it saves her lots of money.  I was immediately on board!  I hounded her until she gave me the list of ingredients and went to a couple different stores to find them.

Here's what you need:
1 bar Fels Naptha
1 C Super Washing Soda
3/4 C Borax
Optional oil for scent:  Tea Tree Oil, Lavender, Lemon, etc.
5 gallon bucket

I found the Fels Naptha at the grocery store.  I found the Borax at my alternate grocery store.  I had to look around for the Super Washing Soda, but finally found it at Target.  I also got generic Tea Tree Oil at Target.  That was a year ago.  I finally came down to having 1 load of detergent left and the refusal to buy more.  I hounded my friend again for the exact directions.

Son #2 was my assistant.  He is both the best in Science and Cooking, so he was the obvious choice.  He was off school today, his brother is on a trip, his sister was at a friend's house, and his other sister was sleeping.  So actually, he was the only choice (and the photographer).

Here's what we did:

1.  Shave the bar of soap into a pot.  (I used my vegetable peeler.  Hope it doesn't make my potatoes taste like soap next time!)

2.  Add 4 C hot water to the soap and melt on the stove, stirring continuously.


3.  Once it's completely dissolved, remove from heat and add rest of ingredients.

4.  Pour into a 5 gallon bucket and fill with warm water 3/4 of the way.

5.  Add your scent.  I used Tea Tree Oil, because that's what she uses.  I added 20 drops.  Also, did you know that Tea Tree Oil deters lice?  When someone had it in my daughter's class, I added a couple drops to her brush and combed through her hair.  My friend adds a few drops to her shampoo.  Just a nice, little tip.

5.  Let sit several hours, preferably overnight.  This is where we are so far.  I'm going to let it sit overnight.  (I need to buy a funnel first anyway!)


6.  The next day, stir mixture.  Pour the concentrate into jugs, filling halfway.  Fill with water.  (I saved my empty laundry jugs for the last year or so.  My friend uses milk jugs.)  Shake well before each use.  My friend uses 1 C per load, but others who make this use 1/2 C per load.  Make your own judgement call there.

Also, this is safe for HE machines.  These products do not create a bunch of suds, which makes it OK to use in your high efficiency machine.

Hopefully I'll be smelling clean and fresh from now on!  (Actually, I hope I always have been, but you know what I mean!)

Tuesday, November 27, 2012

What's For Dinner?

If you haven't entered my Shutterfly giveaway, make sure to do so right away!  The contest ends December 4th at midnight.  Free fifty bucks!!!

I mentioned a few blog posts ago that I finally succumbed to the ever growing Pinterest fad.  Scared of addiction, I avoided it for years.  Finally, I just decided to cannonball into the the Pinterest Pool.  Yeah, I'm now an addict too, but that's another story.

ANYHOO- I noticed a recipe my friend pinned for Orange Chicken.  I like Asian food, but I'm not a huge fan.  I love P.F. Chang's and have enjoyed anything I've ever tried there.  The photo that went along with the post really reminded me of something I might see at Chang's.  I read the ingredients and they were all fairly normal.  I expected to see things like saki, root of wasabi, and other unpronounceable things.  The ingredient list for this recipe were mostly things I had anyhow.  I decided to give it a try.

Wowzers...it was the most amazing homemade Asian food I've ever tasted!  It was actually better than the Asian food I've had at most restaurants and totally tasted like it belonged on P.F. Chang's menu! 

I worried that the kids wouldn't like it (they like nothing).  They do, however, like fried rice.  So instead of making steamed rice to go along with it, I googled how to make fried rice.  (In case you're wondering, you steam the rice, then fry it in very hot oil.  It can't get much simpler than that!)  We don't like the egg or veggies in the rice anyway, so I just made it completely plain.

The kids tore it up; the hubby tore it up.  I took some to my mom who loved it.  I called my sister-in-law with the recipe and she made it the very next day.  She and her mom both went crazy over it.  She passed it on to her sister, who made it and went wild over it.  This is the new beloved recipe in my circle of friends and will be a regular on my menu!

If you even kind of like Asian food, I would suggest giving this recipe a try.  It's not too difficult to make but tastes like you prepared it in a gourmet kitchen.  Here it is, for all my favorite readers!

Orange Chicken
This is the photo my friend texted
me when she made it.  Excuse the
poor quality.
1 1/2 lb. boneless chicken breasts
1/3 C flour
olive oil
1/2 T salt
1 t balsamic vinegar
3T ketchup
4 oz. frozen orange juice concentrate
4 T brown sugar
1/4 t ginger
1 t red pepper flakes, optional

Put orange juice in a mixing bowl to thaw.

Chop chicken into large bit sized chunks.

Add to juice:  brown sugar, vinegar, salt, ketchup, ginger, and pepper.  Stir.

In a ziplock baggie, add flour and chicken.  Shake until each piece of chicken is covered with flour. 

Pour a small amount of oil in a skillet and brown the chicken.  (At this point, the recipe says you can add it to a crockpot to complete cooking.  I kept mine in the skillet and made sure the chicken was cooked all the way through.)  Cover the chicken with sauce and stir.

The recipe says to cook in a crockpot on low for 5-6 hours or on high for 2-3.  I poured the sauce right into the skillet and brought it to a boil, which caused the sauce to thicken.  I served it right then over rice.

*I altered the recipe a bit for my taste.  Reviewers of the recipe mentioned that there wasn't nearly enough sauce for the chicken.  1 1/2 lb. is too much meat for my family, so I just cut down on the chicken and flour and kept everything else the same.  I used two medium sized breasts and one small chicken tender.

*I didn't have balsamic vinegar and didn't want to buy some to use only a teaspoon in the recipe.  I used a teaspoon of white cooking wine instead.

*I know the ketchup sounds gross, but I did it anyway.  I hate ketchup, but you could not taste it in this recipe.

*4 oz. of concentrate juice is 1/3 of a standard sized container.  I just put the rest back in the freezer to use next time.  My mom felt the orange flavor was a bit overpowering.  So if you're worried about that aspect, you could probably use a little less juice or dilute it a bit.

*I don't have red pepper flakes but I wanted to give it a bit of a kick.  I have cayenne pepper, so I used 1/8 t.  It was almost too spicy for me (I'm a wimp), so I might use a scant 1/8 t next time.

If you try this recipe, let me know what you think!!!  I'm going to make it again this week!

Tuesday, June 5, 2012

Food for the Sick & Sourdough Recipe

I'm cooking for a friend tonight who is recovering from major illness.  He is a Superman kind of guy and it's so hard to see him off his feet.  Two months ago, he suffered a major heart attack.  Apparently, he had been having heart attacks for days and chalked it up to indigestion.  He was AT CHURCH, leading the little kids group in singing Happy Birthday to our pastor while he was having a heart attack.  He had open heart surgery the next morning and barely made it through.

Add to that the fact that he is diabetic.  Like, majorly.

Last week, he was admitted back into the hospital with symptoms mocking another heart attack.  Turns out, it's now his gall bladder.  They told him to adapt a bland diet with no salt, sugar, or fat.  "I've already been doing that!!!" he exclaimed.  Poor guy.

SO, what do you cook for someone who cannot have salt, sugar, or fat.  Talk about a head-scratcher!  I'm a good cook, but I must admit it's the salt, sugar, and fat that makes me a good cook!  I decided on a very bland Chicken Paprikash.  Right now, I'm boiling the chicken with a few onions and paprika.  I will add no salt at all. The potatoes and carrots will be fine for him to eat.  I'm not sure if he can have the dumplings I put in, but I guess he can pick those out.  I'm doubting the quality of this dish and am quite nervous about taking it over!

I'm also making a nice, green salad (no croutons, bacon, or cheese- the good stuff) and a loaf of homemade sourdough bread.  I put a pinch of salt in the bread and cut the butter down.  I think he'll be OK to eat that.  Sadly, I'm not taking a dessert.  I'm the queen of desserts and I feel like one of my arms is missing to deliver a meal without dessert.

My friend has lost 50 lbs. recently...I guess this kind of diet would do that to anyone!!!

A commenter asked for my sourdough recipe.  I've posted about how to begin a sourdough starter and I've shared one recipe.  Here's the recipe I'm using presently:

The night before you plan to bake your bread, feed your starter.  There's supposed to be a lot of math involved, but I add 1 1/2 C bread flour or wheat flour and 1 C warm, filtered water.  My starter is much thicker than before...almost like a lukewarm gravy rather than pancake batter.  Leave the starter on the countertop overnight.  It should double in size and be very bubbly.  Take out what you need and put the rest back in the fridge.  If you leave it out too long (more than 12 hours), you will need to feed it again.  This sourdough needs to be fed every few days.

If that plan doesn't work out for you, feed your starter about noon.  Mix up your dough around 9:00 PM and let it sit on the counter overnight for its first rising.

To mix up your dough, combine:
9 oz. starter for the winter OR 4-5 oz. starter for the summer
1 C filtered water, room temperature
Add 1 1/2 T soft butter and
1 t salt
Finally, add 3 C flour in 1/2 to 1 C increments.

You may need to add more water at this stage.  You don't want to the dough to be dry; soft and slightly sticky is good.  Knead well for 5-6 by machine or 15 minutes by hand.  To check if it's needed well enough, pinch off a small piece, about the size of a quarter.  Stretch it out with your fingers.  If it tears easily, it's not ready. If it stretches almost to the point of being transparent, it's good!

Place in a greased bowl and cover for 3-4 hours or until doubled in size.  After it has doubled, knead it by hand for a minute.  Shape into a loaf and place in a greased loaf pan.  Cover with plastic wrap or a damp towel to rise again.  After 3-6 hours, it should rise slightly above the edge of the pan.

Bake at 350 for 45 minutes.

It amazes me that this all works out without any yeast.  If you read my sourdough starter post, you'll see that I was frustrated because my yeast-less dough did not rise.  I'm sure that was my error because the loaves I'm making now rise great!  I think I was given a really good starter this time.  I'm trying to keep it that way!

I don't have a bread machine and I lost the dough hooks to my mixer when we remodeled the kitchen.  Last night, I kneaded two loaves by hand and hope to have killer forearms soon!  :)  This bread is great with butter or for toast.  I have to slice is very thin for sandwiches or it's a bit overwhelming for me.  Just talking about it makes me want a slice.  I just might have to go do that right now!

Wednesday, January 4, 2012

Puppy Chow

Puppy Chow
1 C chocolate chips
¾ C peanut butter
¼ C butter
8 C Crispix cereal

1½ C+ powdered sugar

Melt chips, peanut butter, and butter.  Place cereal in a large bowl; pour mixture over cereal.  Pour coated cereal into a Ziplock freezer bag.  Add sugar; shake until each piece of cereal is coated well with sugar. 

Don't worry about storing it because it won't make it that long.  (I just keep mine in the same Ziplock bag I used to make it.)

*Note:  Some people make this recipe with Chex cereal.  I don't think it's nearly as good with Chex.  It's a more dense cereal and doesn't absorb the melted chocolate like Crispix does.  Also, make sure you use as much powdered sugar as necessary to completely cover the cereal.

Tuesday, January 3, 2012

Scotcharoos

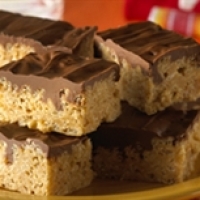
These delicious little squares are such a weakness for me!  I haven't made them in so long because I always want to eat the entire pan myself.  I don't know what it is, but this combination of ingredients is just sinful.  I don't even like butterscotch, but mixed with chocolate, it totally hits the spot.

For New Year's Day, we make a bunch of party food and gather at my mom's house.  They guys watch football and the girls play board games.  Every year, I make Puppy Chow.  It's become a tradition.  I used to make a double batch, but my brother and I would gorge on it and make ourselves physically sick.  That's also what I do with Scotcharoos.  (I made both for this year's New Year's party.)

If you have never tasted these, I strongly suggest that you give them a try.  Just cut up half the pan and give them away before you allow yourself to taste them.  That way, you won't be able to eat the whole recipe yourself.  (I will post my Puppy Chow recipe another day.)

Scotcharoos
1 C Karo syrup
1 C sugar
1 C peanut butter
5 C Rice Krispies
1 C semi-sweet chocolate chips
1 C butterscotch chips

Mix Karo syrup and sugar in a saucepan.  Stir over low heat until it becomes clear and starts to boil.  Remove from heat.  Stir in peanut butter.  Pour mixture over Rice Krispies.  Stir until well combined.  Spread into a 9x13" pan and cool.  Meanwhile, melt chocolate and butterscotch chips.  Stir until smooth and spread over Rice Krispie mixture.  Cut when hard.

*  Tip:  You should microwave chocolate in 30-second intervals to reduce the risk of scorching.  Stir every 30 seconds.

*  I don't care to refrigerate the Scotcharoos because they are very difficult to cut.  I think they are best at room temperature.

Friday, December 23, 2011

All Things Christmas

I decided to snap a few pictures of what Christmas looks like around here so far. 

This is my undecorated tree and the presents that are wrapped so far.  I totally adore my polka-dotted paper!  I'm trying to figure out a place where I can send my kids so I can finish wrapping their presents.  One of Baby Girl's big gifts has been in my closet, covered up by clothes and pillows.  It's a wonder she hasn't discovered it yet.

If you turn around 180 degrees from the tree, this is what you see.  I received a beautiful selection of Christmas cards this year.  It makes the 70 cards I sent out worth the time.  In the background, you can see my present wrapping station and a couple gifts ready to be wrapped.  On the floor is my sister-in-law's KitchenAid mixer.  My brother had it delivered to my house. That sucker is heavy and should be lots of fun to wrap!

Remember that Tiny Prints promotion?  Well, this is the spectacular card I received from them!  Printed on high quality cardstock, it was the ultimate Christmas card!  I received phone calls and text messages from across the country declaring that my card was more awesome than words.  I had to agree.  See that black area in the middle?  I left it like that purposely so that I could handwrite personal messages with a fancy white pen!  And here's the back:

Yeah, I told you it was good!  This was the first time I had ever used a picture of myself on our cards.  Yeah, that picture is over a year old but...well, you know!  The picture on the left of all of us was just taken in August.  So I'm not like those 90-year-old people in the obituaries who have photos from when they were 29.

Finally, this is what is going to be the death of me.  Do you know what Buckeyes are?  I've found that many people who aren't from this part of the country call them peanut butter balls.  I store them in the refrigerator because they taste so delicious when the chocolate has hardened!  I hope I find time today to make Red Velvet Cupcakes. 

Today is our "Christmas Eve."  Since we're going to church on Christmas morning, we are going to wake up tomorrow and pretend it's Christmas Day.  Tomorrow evening will be spent with my parents and brother.  We will spend Christmas afternoon with my mother-in-law...we are all she has in life.  She was widowed twice and only had one child.  All her siblings have passed away.  I always feel sorry for her around holidays.  On Monday, Hubby is off!  We will have Christmas with my mom's side of the family, which will be our biggest event.  I love having a big family and I try to picture what life will be like in 20 years.  My four kids will hopefully all come home with their spouses and children.  I think I'm going to have to build a bigger house if I want them all to fit for holidays!

So, this is it.  It's nearly here.  Are you ready?  If so, here's my fabulous recipe for Buckeyes!

Buckeyes
1 lb. creamy peanut butter (2 1/4 C)
1/2 lb. butter (2 sticks)
1 1/2 t vanilla
1 1/2 lb. powdered sugar (5 2/3 C)

Blend peanut butter, vanilla, and butter together on low speed of mixer.  Add powdered sugar.  Mix by hand and knead.  Roll into balls 1" in diameter.  Put on waxed paper and refrigerate one hour. 

Chocolate dip:
6 oz. semi-sweet chocolate
6 oz. milk chocolate
paraffin*

Melt chocolates and paraffin in double boiler.  Insert a toothpick in the center of each peanut butter ball and dip in melted chocolate, leaving a small circle of peanut butter showing.  Place back on waxed paper to set.  When hardened, rub out the hole created by the toothpick.  These keep for quite a while in the refrigerator.  I've never had them around long enough to go bad!

*Parrifin is a wax used in candle making.  It's totally safe for cooking.  You can find it in the baking aisle at your grocery store.  It thins out the chocolate and makes it the perfect consistency for dipping.  I shave off little bits at a time with a knife until the chocolate pours easily from a spoon. 

Thursday, December 22, 2011

Baking With Mom

Yesterday was my perfect pre-Christmas day.  I was able to spend the day with my mom and we baked up a storm!

Every Christmas, we get together and make nutroll.  It's a recipe handed down from my great-grandmother and is my grandpa's very favorite thing.  It didn't look like we were going to find the time this year.  My mom gives any spare time taking care of her ailing mother.  Last year, we had Gram come over while we made nutroll.  That would not be a possibility at all this year since time with her is typically spent preventing her from running out the door.  My mom knows this will be her last Christmas with her mother around so she's trying to spend as much time with her as possible, making as many memories as possible.

Somehow, my mom found time to take a day off and spend it with me.  It was due partly to the fact that her car was in the shop getting some dings repaired and that she was recovering from having a skin irritation removed the day before.  We made nutroll, chocolate crinkles, chocolate fudge, and buckeyes.  After we were done, I had to run home and finish up some iced sugar cookies that people had ordered from me.  Note To Self:  Do not agree to make iced sugar cookies for people right before Christmas.  You are too busy.  Plus, you are not charging nearly enough!  The cost of butter alone eats up half the profits!  Raise your prices or get a backbone!  (Sorry, I had been meaning to have that chat with myself for a while now.)

After all that, my house is a wreck.  I still have cookies to decorate and peanut butter balls to dip in chocolate.  The kids are home on Christmas break and the presents aren't all wrapped yet.  I'm going to have to find somewhere for the kids to go when it becomes present wrapping time.  For now, I think it's time to turn back on some Pandora Christmas music and get this house back into shape.  You know me, I won't be able to enjoy Christmas at all if my house isn't clean.  Anyone want a cookie?

Here's my Christmas Gift to you- my nutroll recipe.  This is a family heirloom so you should consider yourselves lucky!  (Warning:  this recipe isn't for novice bakers.)

Nutroll

Bread Dough:
1/2 lb. butter (cold)
5 egg yolks (save whites)
3/4 C milk (warm)
2 T sugar
4 C flour
1 envelope yeast
pinch of salt
1 t vanilla

With your hand, work cold butter and egg yolks together. (It will look a bit like scrambled eggs when it's ready.) Add yeast to warm milk and sugar. Let stand until yeast swells in milk, about 5 minutes. Add flour and salt to to egg and butter, then add milk and yeast mixture. Add vanilla. Knead like bread dough. Cover and let stand 20 minutes.

Put on pastry board, work out a little, cut into 4 pieces, and let stand 20 minutes.

Roll each piece and fold over several times. Let stand 20 minutes more.

Roll thinly and fill each piece with nut filling.

Nut Filling:
5 egg whites
4 C powdered sugar
1 lb. walnuts (ground)
1 t vanilla

Beat egg whites until stiff.  Add nuts, powdered sugar, and vanilla.  Spread 1/4 of the filling on dough and roll like a jelly roll.  Pinch ends to make sure filling doesn't seep out.  Bake at 350 for 30 minutes.  Repeat with other three.

My Notes:
*  We buy bread bags from our grocery store's bakery to store the nutroll in.
*  Nutroll freezes well.
*  If making more than one batch, be sure to wash the bowl and all the tools well that are used to make the filling.  The egg whites will not become stiff if there is reside from the last batch still in the bowl.
*  Specialty shops sell nutroll pans.  They are about the size of a cookie sheet but are curved to help shape the rolls.  We found several at an Amish shop and have used them for years.  You can bake them on a cookie sheet but they will flatten out a bit.

Tuesday, November 8, 2011

Baking Up Some Goodness

I'm a featured blogger!  Jenna from Jenna's Journey is running a 12 Days of Goodies feature in preparation for Thanksgiving.  She has chosen my Pumpkin Cupcakes to showcase today!

Head on over there and check it out!  I am sure that the remaining Days of Goodies will be something to behold!

Sourdough Starter

Forever ago, I posted about my experiences with homemade sourdough bread.  I said I would provide you with the directions to make your own starter whenever I got it from the person who supplied me with my starter.  Well, she never gave me the directions.

I really enjoyed making my own bread and planned to experiment with sourdough pancakes and pretzels.  But then summer came.  Who in the world wants to heat up their oven and their entire house when it's 90 degrees outside?  I let the starter go.

Now that it's cold and rainy out once again, I'm craving the fresh taste of homemade bread.  So I decided to find directions for making your own starter online.  Viola!  I just love having the resource of the internet at my fingertips!  (You'll notice that the directions in this post vary slightly from the directions in my other post.  It made me realize, this is not science.  It doesn't really matter how you do it, just as long as you do it.  Don't stress over it; it's not as complicated as you think.)

So, sorry I'm so late, but here's how you begin your own sourdough starter:

Combine 1C warm water and 1C flour (any type).  A wide-mouthed, glass jar works best.  It's good if you can easily see what's going on in the container.  A disposable container, Tupperware, or old mayonnaise jar works too.  Do not use metal containers or utensils.

You need to feed the starter every 24 hours. 
  • First, throw half of it away.  I don't know why, but every site about sourdough starters says this.  So it must be important.  My friend removed half but didn't throw it away.  She kept it in a second container and fed it separately.  That's where I got my original starter from.  So I guess that's OK too. 
  • Add 1/2 C flour and 1/2 C warm water and mix. 
Your starter should sit at a temperature between 70 and 80 degrees.  You don't want to use an air-tight lid.  A cloth draped over the container will suffice.  I just left my lid lying on top of the jar, tilted to the side.  The starter will bubble and smell pleasantly sour (possibly like beer, they say).  It may puff up.  When it develops a bubbly froth, it's done. 

Move the starter to the refrigerator with a lid on it.  If the lid is air-tight, poke a hole in it.  At this point, the starter only needs to be fed once a week.  (You can read more about that in my other post.)  You do not have to be meticulous about feeding it.  Missing a day or two won't kill it.  Some people said they only fed theirs the day before they planned on using it.

I wouldn't recommend using a Mason jar.  The opening was too small and made adding the flour difficult.  I made a mess all over the sides of the jar.  Plus, the container was a bit too small.

Day 2:  I split the starter in half and added 1/2 C warm water and 1/2 C flour to each.  (If I'm going through all this work, I will be starting out with two loaves of bread.)  Here is what it looked like before I did anything to it.
One thing you may notice in your starter (as seen in this picture) is a yellowish liquid forming at the top of your jar.  This is called hooch.  It's fermentation and it's harmless.  If it disgusts you, you can pour it off.  You can also just mix it back in, which is what I do.  That's kind of what sourdough bread is about.  If the liquid is really off-colored or moldy looking, you need to toss out the starter and begin again.

The starter changed very slowly over the next several days.  I keep my house pretty cool so I think it may have taken longer.  One article I read said that they would never use starter that was less than a week old anyway.

After about 8 days, I determined that my starters were done enough.  They weren't really changing any more.  So I put one starter in the fridge with a dish cloth rubber banded around the top.  I immediately began mixing the other starter into a sponge.  I didn't use the recipe I posted the first time.  I tried the recipe from the same site where I got my starter ingredients.  It did not work.  The sponge did not rise at all so I threw it out.  The second recipe did not have yeast in it.  The site said that true sourdough bread does not have yeast...the fermentation should be enough to cause it to rise.  Well, I don't care if my bread is true sourdough or fake sourdough.  I just want it to rise and taste good. 

Despondent, I fed the starter and put it back in the fridge.  I contemplated starting over and dumping everything out.  But I had worked so hard!  I think I used an entire bag of flour making these two starters!  I decided to hold off a couple days and think about it.  Almost a week later, I decided to try baking bread again, this time using the first recipe I tried.  Success!  My house smelled fantastic and the bread turned out great!  So, the moral of my story is this:  use a recipe that has yeast in it!  Who cares if you're not an authentic sourdough baker- as long as it tastes good!

Also, one article I read said that the riper the starter, the paler in color your loaf will be.  That was absolutely true.  As you can see in the photo in my last post, my loaf was very brown in color.  This time, my starter ripened for a week and my loaf came out very pale.  It had a stronger sourdough smell and definitely a stronger sourdough taste.  I liked it even better than the bread I made in early Spring!

So, I'm passing off my trials and error to you, loyal blog readers!  I hope you give it a try.  The starter is time consuming but it's not really that much work.  Making your own bread is fun, inexpensive, and tasty!  Give it a try and let me know what you think!

Thursday, October 27, 2011

Pumpkin Cupcakes

Warning:  if you are taking part in my weight loss/healthy eating challenge, do not make these.  They are addictive.  I had to give the rest of mine away because I couldn't leave them alone.  Trust me.  Don't do it. 

Now, for everyone else, try these cupcakes!  They are divine!  They are great year round but even more perfect at this time of the year.  I was introduced to this recipe at a funeral years ago.  I often volunteered to help serve the funeral dinners at my church.  One woman would always bring this pumpkin cake.  It was so delicious and was the first dessert to disappear.  I broke down and asked her for the recipe and was surprised at how easy it is! 

My kids were eating the icing with a spoon.  (I didn't tell them there was cream cheese in it.)  It goes perfectly with many other cakes and desserts too.

Pumpkin Cake
2 C sugar
2 C flour
2 C pumpkin
2 t baking soda
½ t salt
2 t baking powder
2 t cinnamon
1 C oil
4 eggs

Mix all ingredients well. Pour into a greased 9” x 13” pan. Bake at 350º for 35-45 minutes.  (I baked my cupcakes for approximately 20 minutes.)
 
 
Cream Cheese Frosting
Cream together 1 lb. powdered sugar, 8 oz. cream cheese, 1 stick butter, and 2 t vanilla.

I'm linking up with JDaniel4's Mom and her Halloween Traditions!

Thursday, September 29, 2011

Easy Dinners

Don't you just love those easy dinners that don't take much preparation?  I consider spaghetti to fit into that category, but not spaghetti and meatballs.  I love intense, homestyle cooking, but sometimes you need a quickie meal.

Here are a couple things I've made recently that fit into the Easy Dinner category.

Chili- I think this recipe is so good, you'd never think it was that easy.
  • In a large pot, saute onion in butter.  (I use just a couple tablespoons of onion, but you can use more depending on your taste.)
  • When the onion is golden brown, add one clove of pressed (or minced) garlic.
  • Add 2 lbs. of crumbled ground beef.
  • Brown well and drain all grease.
  • Add one 28 oz. can of tomato sauce and one 28 oz. can of tomato puree.  (If you don't like your chili thick, add two cans of sauce and no puree.)
  • Add 1/2 to a whole package of McCormick chili seasoning.  (I only use half a package so it's not too spicy for my kids.)
  • Add approximately 2t sugar to cut the acidity.
  • Add salt, if necessary.
  • Here is where my chili gets unique.  I think some people would call it goulash instead of chili.  I add elbow macaroni.  I don't measure, I just kind of sprinkle it over the chili until it thinly covers the top.  No one in my family likes beans so we don't add any. 
  • Cover and simmer until pasta is tender.  If you don't use macaroni, your chili is done any time.  I don't believe that you have to simmer chili for hours upon hours to make it good.  But it certainly doesn't hurt.  Just keep it low.

Chicken Club Sandwiches
  • Our local grocery store offers ready-made rotisserie chickens for $4.99, any time.  You can't even buy a whole raw chicken for that price.  Monday, I bought a chicken in the morning during my regular grocery shopping time.  I refrigerated it until dinner time.  20 minutes before dinner, I popped it into the oven to heat it through.  While it was warming, I microwaved a few strips of bacon.  I sliced the chicken and layered it on good quality bakery bread.  I topped it with bacon, CoJack cheese slices, lettuce, tomato, and mayo.  It was a quick and easy supper that made cooking at 9:00 PM more bearable. 

Hopefully one or both of those recipes will give you some quick dinner ideas for when you're on a time crunch.  (Isn't that every day???)

Monday, September 26, 2011

This Little Piggie had Roast Beef

I have never really made a good pot roast.  My mom made roast and potatoes all the time when I was growing up.  It was always good, but not phenomenal.  The potatoes, on the other hand, were amazing when she cooked them with the roast.  I remember declaring roast beef potatoes as my favorite food when I was just a kid.
When I got married, juggling a husband, a job, and student teaching was strenuous.  We were pretty poor and eating out was not an option.  I remember how easy it was when my mom made a pot roast.  She put it in the pan and turned the heat on.  That was about it.  You could throw in potatoes and carrots too.  So I did that.  It was not good. 

I tried again many times throughout the years.  I used the stovetop, the oven, the crockpot.  I cooked it for many hours, I cooked it for just a couple hours.  I finally came to the realization that I must just not like roast beef.  Bummer too, because I love those potatoes!

Jenna from Jenna's Journey recently posted about how good her Mama's roasts are.  She included a picture that made me want to drool.  She had some unique directions that I had never tried before but it still sounded extremely easy.  So I bought a roast and baby carrots on my next shopping trip and decided to give it a try.  I changed a few things along the way so I wrote them down just in case I loved it enough to make again.  It was a success and I will definitely be making it again!

(I failed to get a picture before we began eating.  As there were no leftovers, I certainly couldn't take one after dinner.  So I stole a random roast beef picture from Google.)  Here's my "recipe":
  • I heated just a bit of oil in a large skillet.  Jenna's recipe called for garlic powder, which I did not have.  So I browned a whole clove of garlic in the oil.  I decided to leave the whole clove in with the roast while it cooked and removed it later.
  • I sprinkled the roast with pepper only and browned both sides in the garlic oil. 
  • Then I added 1/4 C regular soy sauce, 1 C beef broth, and a large drinking glass of water. 
  • I brought it to a boil, then covered and simmered it slowly.
  • After 4 hours, I added peeled, quartered potatoes.
  • About 2 hours later, I added a couple handfuls of baby carrots.  There was still plenty of liquid in the pan but I would have added more if necessary.
  • I cooked the roast for 7 1/2 hours total.
  • As the kids set the table, I made a roux of 2 T butter and 2 T flour.  I slowly added hot broth until the consistency was perfect for gravy.  (There was still quite a bit of liquid left in the pan.)
Hubby went wild.  Son #1 declared this to be his most favorite supper from now on.  Baby Girl picked a little and then asked for soup.  I poured some of the extra broth into a small bowl and she ate it.  I now have to change my opinion that I don't like roast beef.  Because this, my friends, was Da Bomb!  I will be adding it to our regular rotation!  Thanks, Jenna!!!  (Thank your Mama too!)

Thursday, September 22, 2011

Cheesy Bread

I am about to share with you a gem of a recipe!  It is incredibly easy to make and tastes absolutely wonderful.  The ingredients are bread, cheese, and butter.  Who could not like something made with bread, cheese, and butter???  However, it does lack a spectacular name.  I guess you could call it Cheesy Bites or something equally cutsie, but Cheesy Bread does the trick for me.  It's a lot of fun to serve at a football party or even a baby shower.  It's best hot but is even tasty room temperature.

Start with one loaf of frozen Rhodes bread dough (or whatever brand your supermarket carries).  You can take it straight from the freezer, set it on a greased plate, and cover with greased plastic wrap.  Let it sit there for many hours and you have a perfect, risen loaf of dough to work with.  Or you can take the shortcut method, which suits me much better.  Place your frozen loaf on a greased plate and pop it in the microwave for a minute.  Cover it and let it rise for only a couple hours instead of many hours.  For this recipe, the bread doesn't even have to be completely risen.  You can see how it looked when I started to prepare my bread.

Next, set up a little assembly line.  You will need 1/2 stick to 3/4 stick melted butter and 1C+ shredded Cheddar (or Cheddar Jack) cheese.

Tear off a small piece of dough, about the size of a cherry tomato.  Dip it into the butter and press the buttered part into the cheese.  The cheese will stick to the butter.  Wrap the dough around the cheese, keeping the majority of the cheese inside.  Tuck the edges on the bottom, which leaves you with a pretty nice, smooth top.  Place the dough balls into a greased baking dish.  If your dough was mostly risen, you can place the balls of dough right next to one another.  If the rising process wasn't complete, the dough balls can touch, but don't crowd them.  When you're finished, dump the remaining butter on top of the bread, spread it around, and top with the remaining cheese.

At this point, you can cover the bread and put it into the refrigerator for several hours.  If you will be baking soon, let it sit on the counter and continue rising.  I put mine straight into the oven and baked it.  (I was in quite a hurry.)  I normally make this recipe in an 8x8" (or 9x13" for 2 loaves) glass baking dish.  However, I was taking this to an event so I used a disposable pan.

Bake at 350 until it's done.  (The more the dough rises, the shorter the cooking time.)  You want to make sure the top is browned so it's not doughy inside.

Enjoy!  It's also served good with marinara sauce.